Posts

Showing posts from July, 2016

T-Brick Shed: Drip Edge, Felt Paper and Roof Paneling

Image
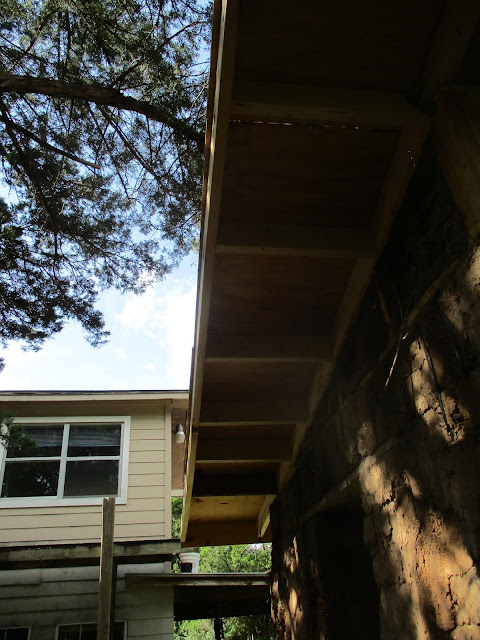
Give a cob house a good pair of boots and a good hat and she'll last forever . - Old English saying O frabjuous day! It's been a long time coming but the shed now has permanent rain protection. Hurrah! First task of the day was trimming off the decking extending out past the flying rafters and fascia boards. I started off with the My-T-Fine cutter from below. It was little awkward and slow going so I switched over to a circular saw. With the excess decking removed, I was able to install 1x2 drip edge all the way around. After 2 months of sun we got a deluge this past week. My parents got 3" at their house. Unfortunately, the gaps in the decking served to channel the water and really chew up a few portions of the wall. After lunch we picked up the sheet metal roof panels. Installing the felt paper. The nail gun makes quick work. Felt paper down. Getting ready to bend some flashing into shape. Installing flashing

T-Brick Shed: Rafters and Decking

Image
This weekend we attached the rafters, fascia boards and installed the decking. It's beginning to look very roof like. Cutting a short rafter to install on the pony wall. Sure is nice to have a shady work space. Installing the short rafter on the pony wall. All rafters are attached apart from ones on either outside edge (flying rafters). I was working solo on Friday so to get the outside rafters on I made a couple of holders from some scrap wood and attached them to the outriggers.  Attaching the flying rafter to the outriggers Installing the flying rafter on the other side. After attaching the flying rafters, I installed some blocking between the outriggers and put way more screws than I probably needed into the rafters to see they were securely fastened to the bond beam/top plate. On Saturday we put fascia boards on the front and back. Unloading plywood for the decking. It's good to keep those old people active. Using the ladder

T-Brick Shed: Pony Wall Infill and Laying out the Rafters

Image
We collected several interesting larger bottles whilst gathering beer bottles for the bottle wall on the south wall. I decided to put them to use infilling the western and eastern pony walls. I mixed up a batch of cob with an extra helping of straw. As the infill is as much bottle as well I thought the extra straw would good for holding things together. Since it wasn't load bearing and I wanted to bottles to stick out past the wall to catch more light, the cob is only 3 - 4" wide. Finishing the largest panel on the western wall. An inside view. After applying the final plaster coat, I'll clean off the bottles. Finished western infill wall. I also crowned the top of the wall covering up blocks providing tension for the poly strapping. Working on the eastern infill wall. Cutting out the birdsmouth on rafter. Hoisting the rafters on to the walls Laying out the rafters

T-Brick Shed: Installing Bond Beam and Pony walls

Image
Sorry for the reporting delay. I started getting these on my computer: The dreaded BSOD And it's taken me a couple of weeks to get it sorted out. All is well now though. We're on to the conventional building portion of our natural building project. Natural roofing options are few and tend to be difficult any time consuming. Setting up the work station Laying out the bond beam. The diagonal pieces are just there temporarily to keep everything square until I affix the bond beam. Bond beam affixing equipment. The blue handled tool on the left tensions the straps and the tool on the right clamps the ends together Put the clamp down on a strap. Happy to be back in his carpentry wheel house my Dad assembled the pony walls while I strapped the bond beam down. The assembled back pony wall Testing the lintel strength. Attaching the pony wall It was difficult to get the straps really taught so I wet down the top of the wall and wedged t